Getting started
This document provides a quick introduction to using EntityModule in your application.
What we’ll do:
-
Create a simple application with EntityModule
-
Add a property to an entity
-
Customize a list and form view
-
Customize a property control
Create a new web application
In the following sections, we’ll start from an application generated through the Across Initializer. We’ll generate an application for Across 2.1.2.RELEASE with the following modules:
-
AcrossWebModule -
AdminWebModule -
AcrossHibernateJpaModuleincluding the example entities -
EntityModule
Once we start up the application, we’ll see that EntityModule is bootstrapped.
INFO --- c.f.a.c.c.bootstrap.AcrossBootstrapper   : AcrossContext: DemoApplication (AcrossContext-1)
...
INFO --- c.f.a.c.c.bootstrap.AcrossBootstrapper   : 6 - EntityModule [resources: entity]: class com.foreach.across.modules.entity.EntityModule
INFO --- c.f.a.c.c.bootstrap.AcrossBootstrapper   : 7 - DemoApplicationModule [resources: demo]: class com.foreach.across.core.DynamicAcrossModule$DynamicApplicationModule
INFO --- c.f.a.c.c.bootstrap.AcrossBootstrapper   : 8 - SpringSecurityModule [resources: SpringSecurityModule]: class com.foreach.across.modules.spring.security.SpringSecurityModule
INFO --- c.f.a.c.c.bootstrap.AcrossBootstrapper   : 9 - AcrossContextPostProcessorModule [resources: AcrossContextPostProcessorModule]: class com.foreach.across.core.AcrossContextConfigurationModule
The generated demo application already contains two entities, Author and BlogPost.
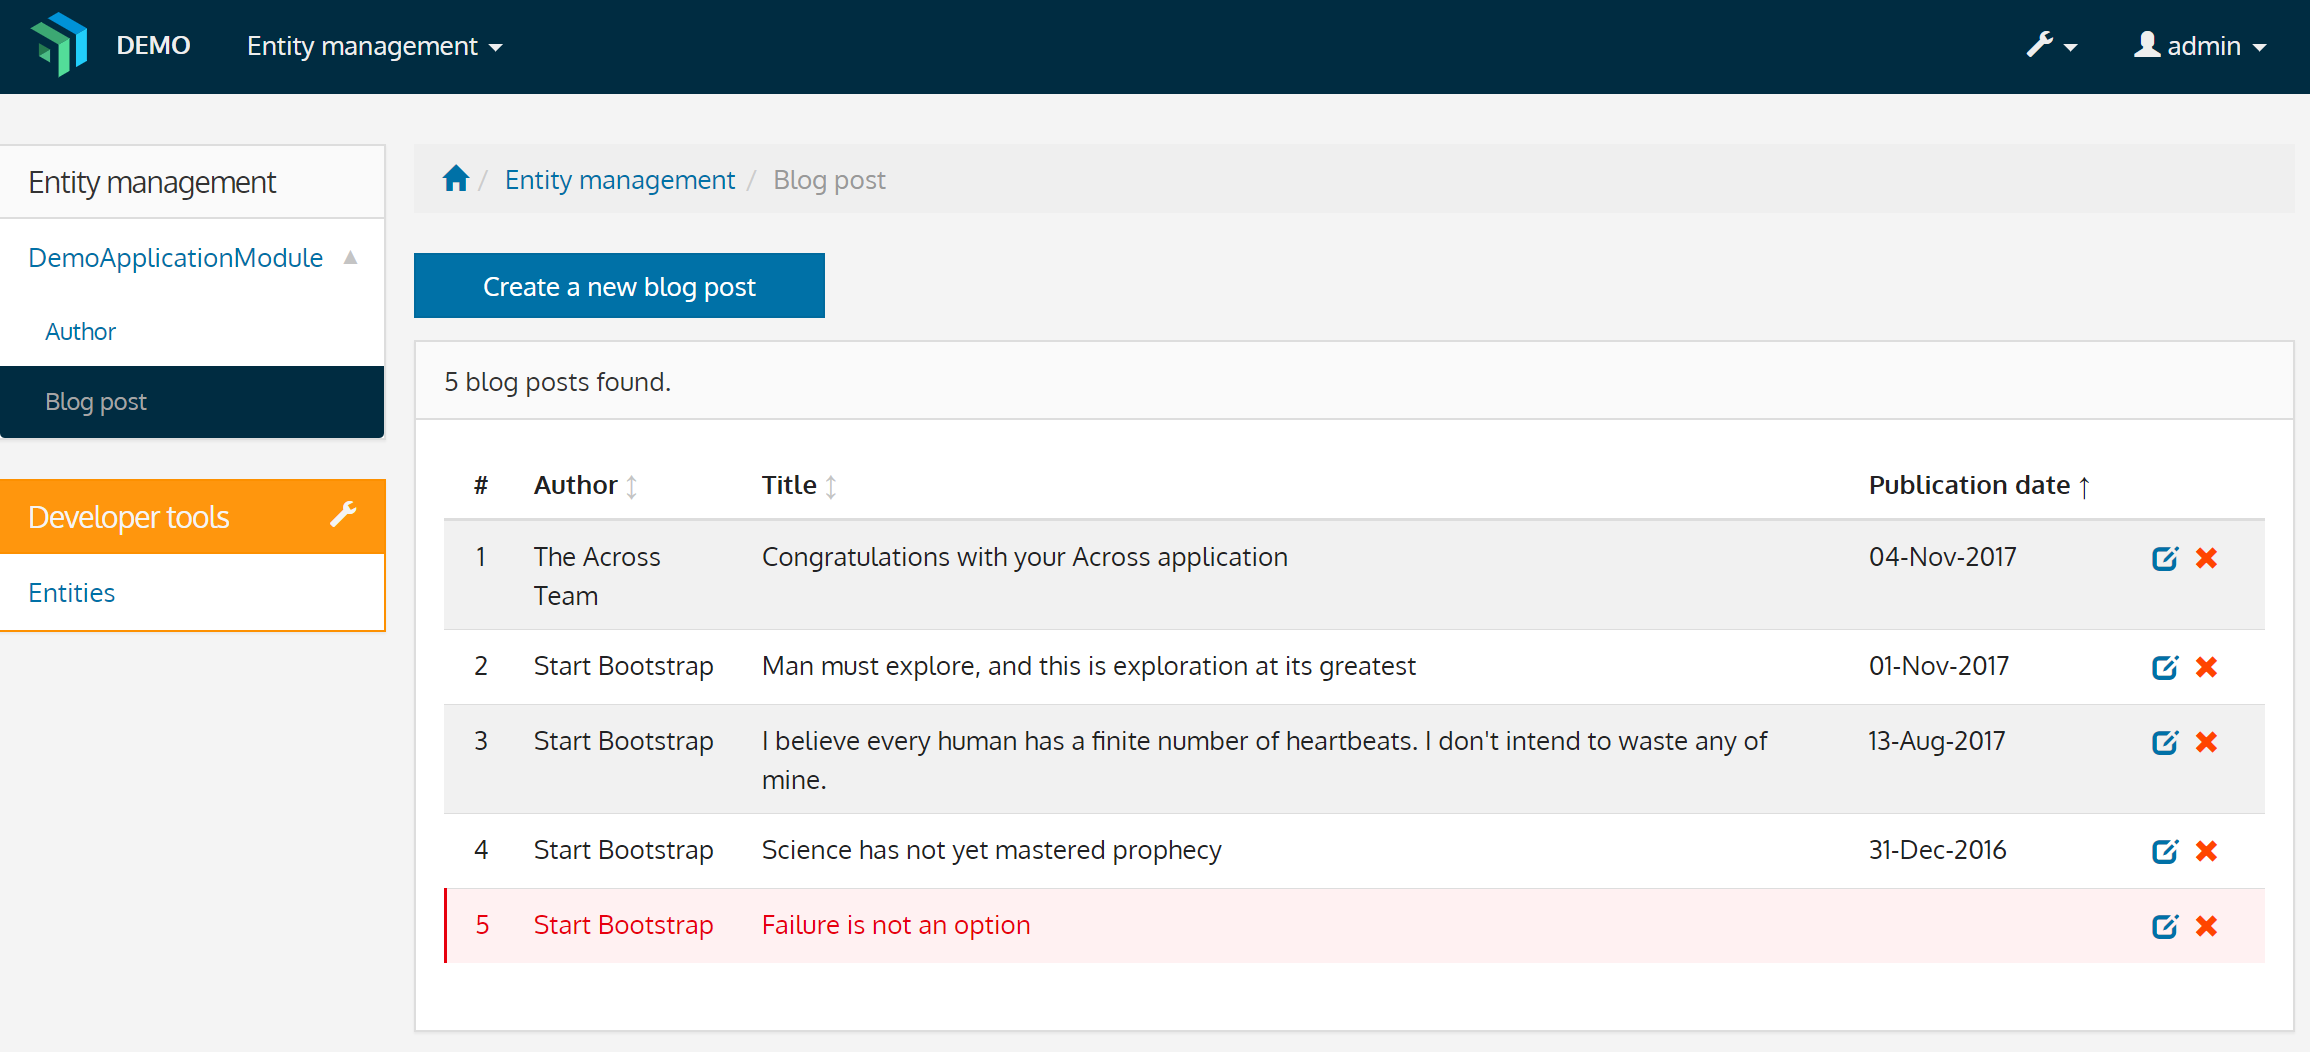
By navigating to the administrative section of the application, located at the path /admin, you’ll immediately discover various views for these entities, available through the menu under the Entity Management section.
Some of these views have already been slightly customized by configuration which you can find in the DomainConfiguration class.
Adding a property
In this section, we’ll add a property to the BlogPost entity, being a number of required peer reviews.
Of course numbers can also be negative, but you can’t have a negative amount of reviews, so we’ll add some validation which ensures that only a positive number can be entered.
To add the property, simply specify it on the entity.
public class BlogPost extends SettableIdAuditableEntity<BlogPost>
{
  	...

  	@Column
  	@Min(0) (1)
  	private int requiredPeerReviews;
}| 1 | It should not possible to review a blog post less than zero times. |
Before the property is accessible, we’ll also require a database column.
Database modifications are usually managed via liquibase changelogs as they provide more control, but for simplicity we’ll let hibernate generate the column for us.
We can do this by setting the hibernate.hbm2ddl.auto property to update.
...
acrossHibernate:
  hibernate-properties:
    hibernate.hbm2ddl.auto: update
...
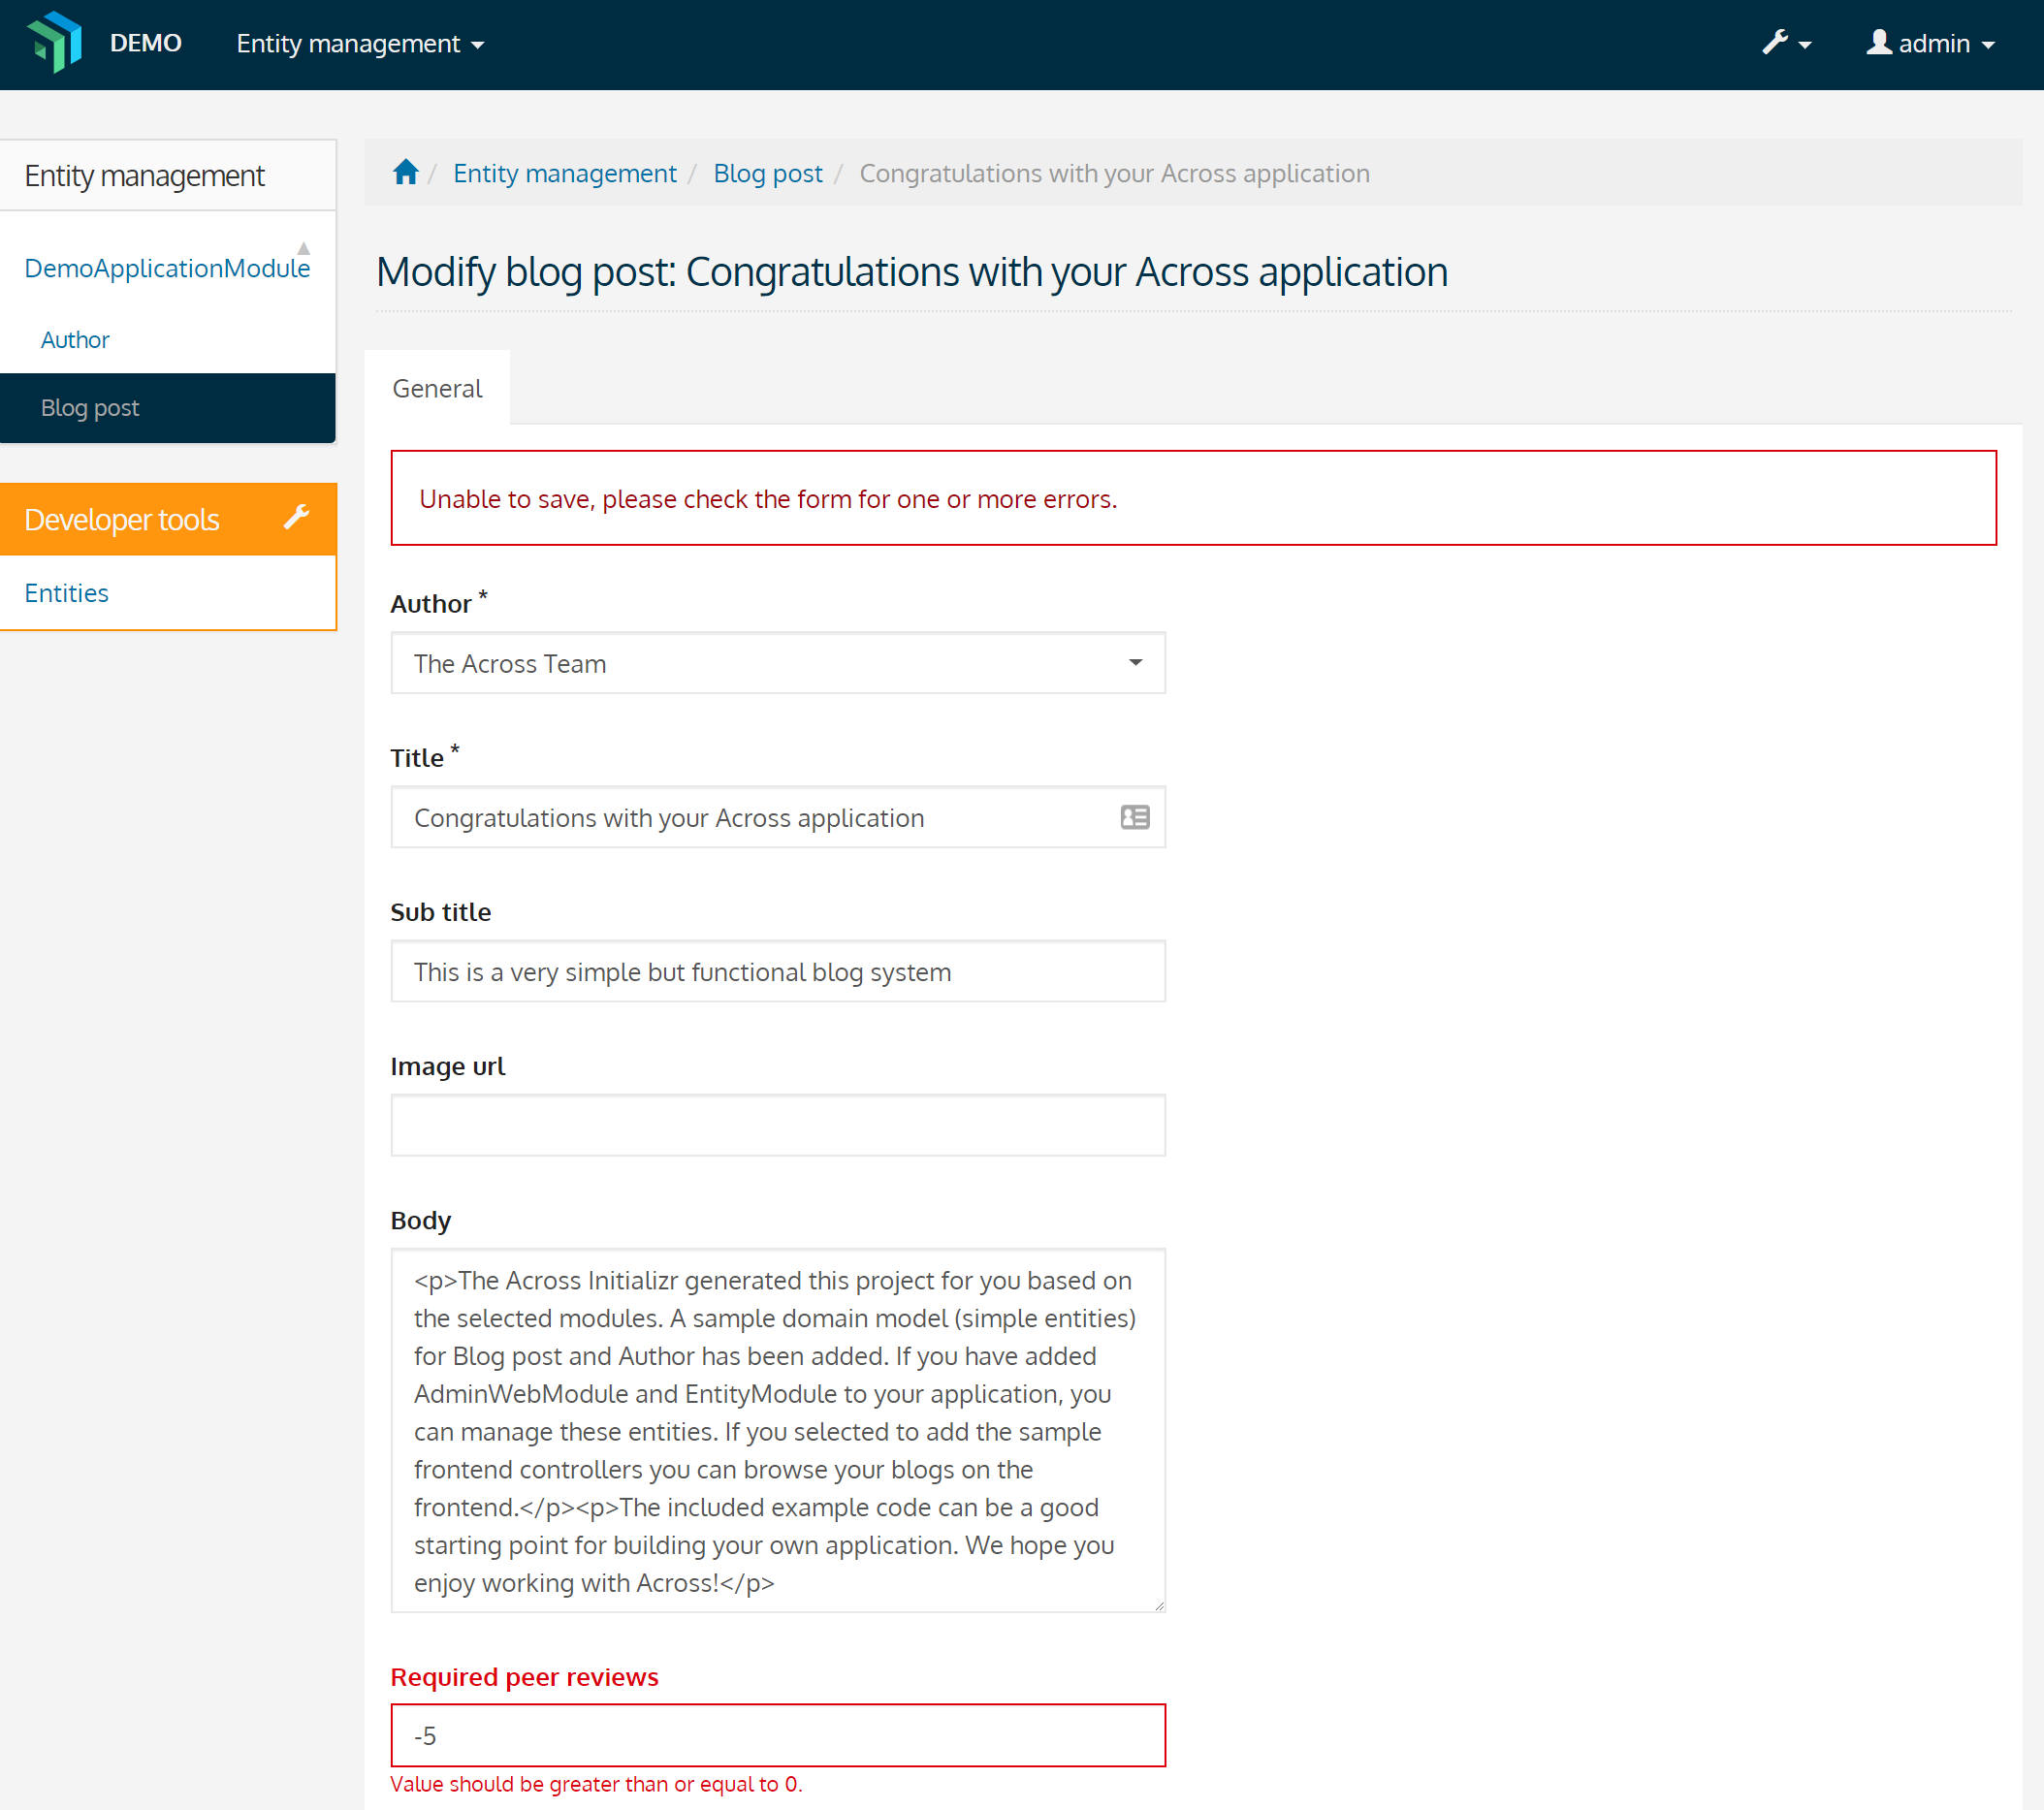
By restarting the application and navigating to the update view for a BlogPost, we’ll see that the property has been added.
EntityModule will inspect the metadata of entities to generate controls and, if necessary, also perform validation.
As such, should we try to enter a negative number, a validation message will be given.
Customizing views
Aside of adding properties or entities, views are often customized as well. In this section, we’ll help you modify:
-
a list view, which is the overview page that lists all instances for an entity
-
an update view, which is used to modify an instance.
Modifying the overview page
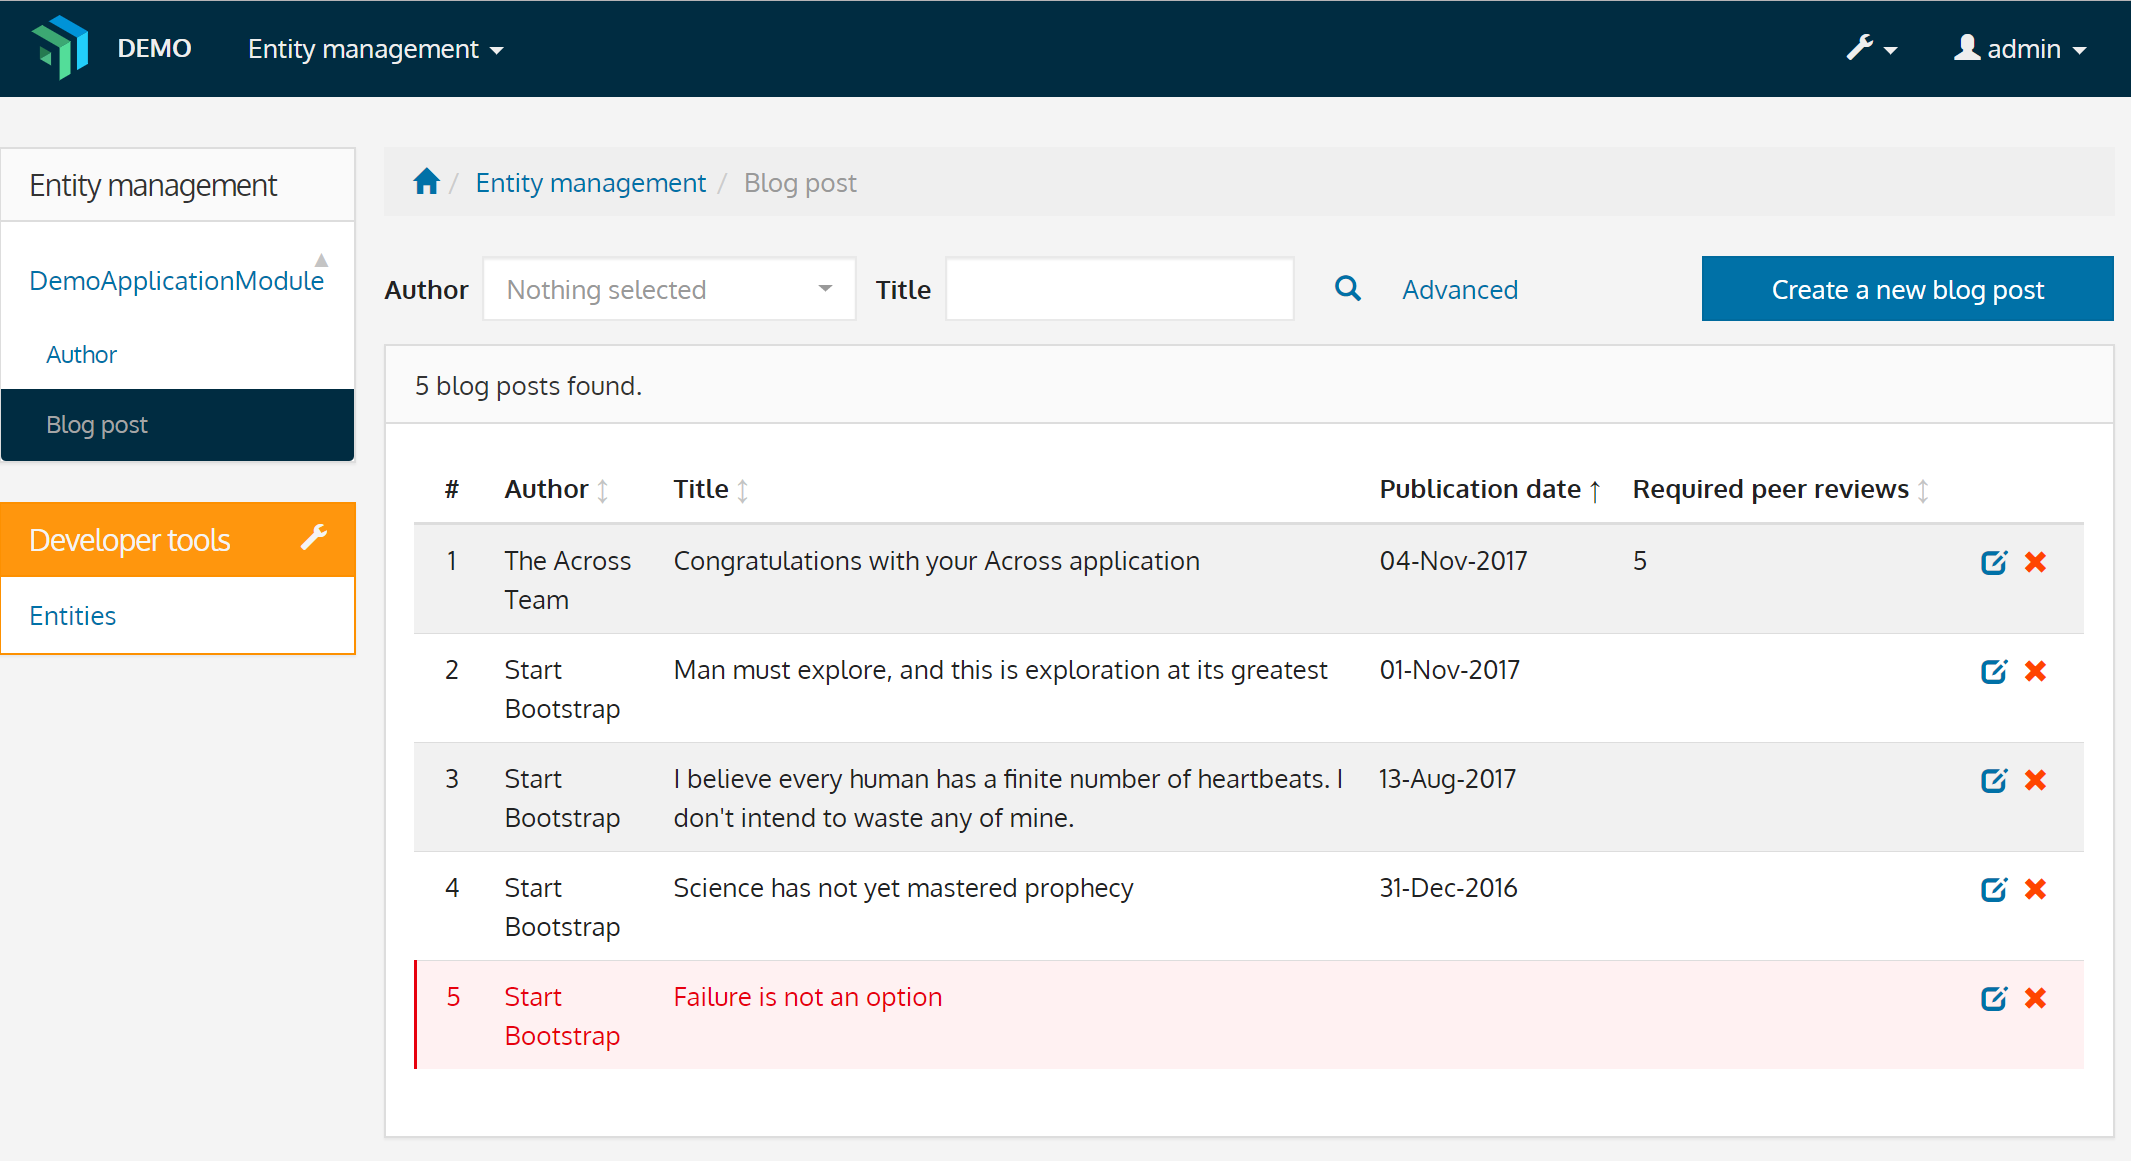
We’ll modify the overview page to show the property we’ve just added in the previous section. Aside of showing our new property, it would also be useful to be able to filter blog posts, either by title or by author, so we’ll also add filter controls for those properties.
To customize the entities in our application, we’ll create a configuration class which implements the EntityConfigurer interface.
@Configuration
@OrderInModule (1)
class DemoEntitiesConfiguration implements EntityConfigurer
{
	@Override
	public void configure( EntitiesConfigurationBuilder entities ) {
		entities.withType( BlogPost.class )
		        .listView(
				        lvb -> lvb.showProperties( ".", "requiredPeerReviews" ) (2)
				                  .entityQueryFilter(
						                  eqf -> eqf.showProperties( "author", "title" ) (3)
				                  )
		        );
	}
}| 1 | We’ve added the @OrderInModule annotation to ensure this configuration class will be executed after the other configuration classes in the application module. |
| 2 | Show all the previously configured properties and render requiredPeerReviews as well. |
| 3 | Add filter controls for author and title. |
Modifying the update page
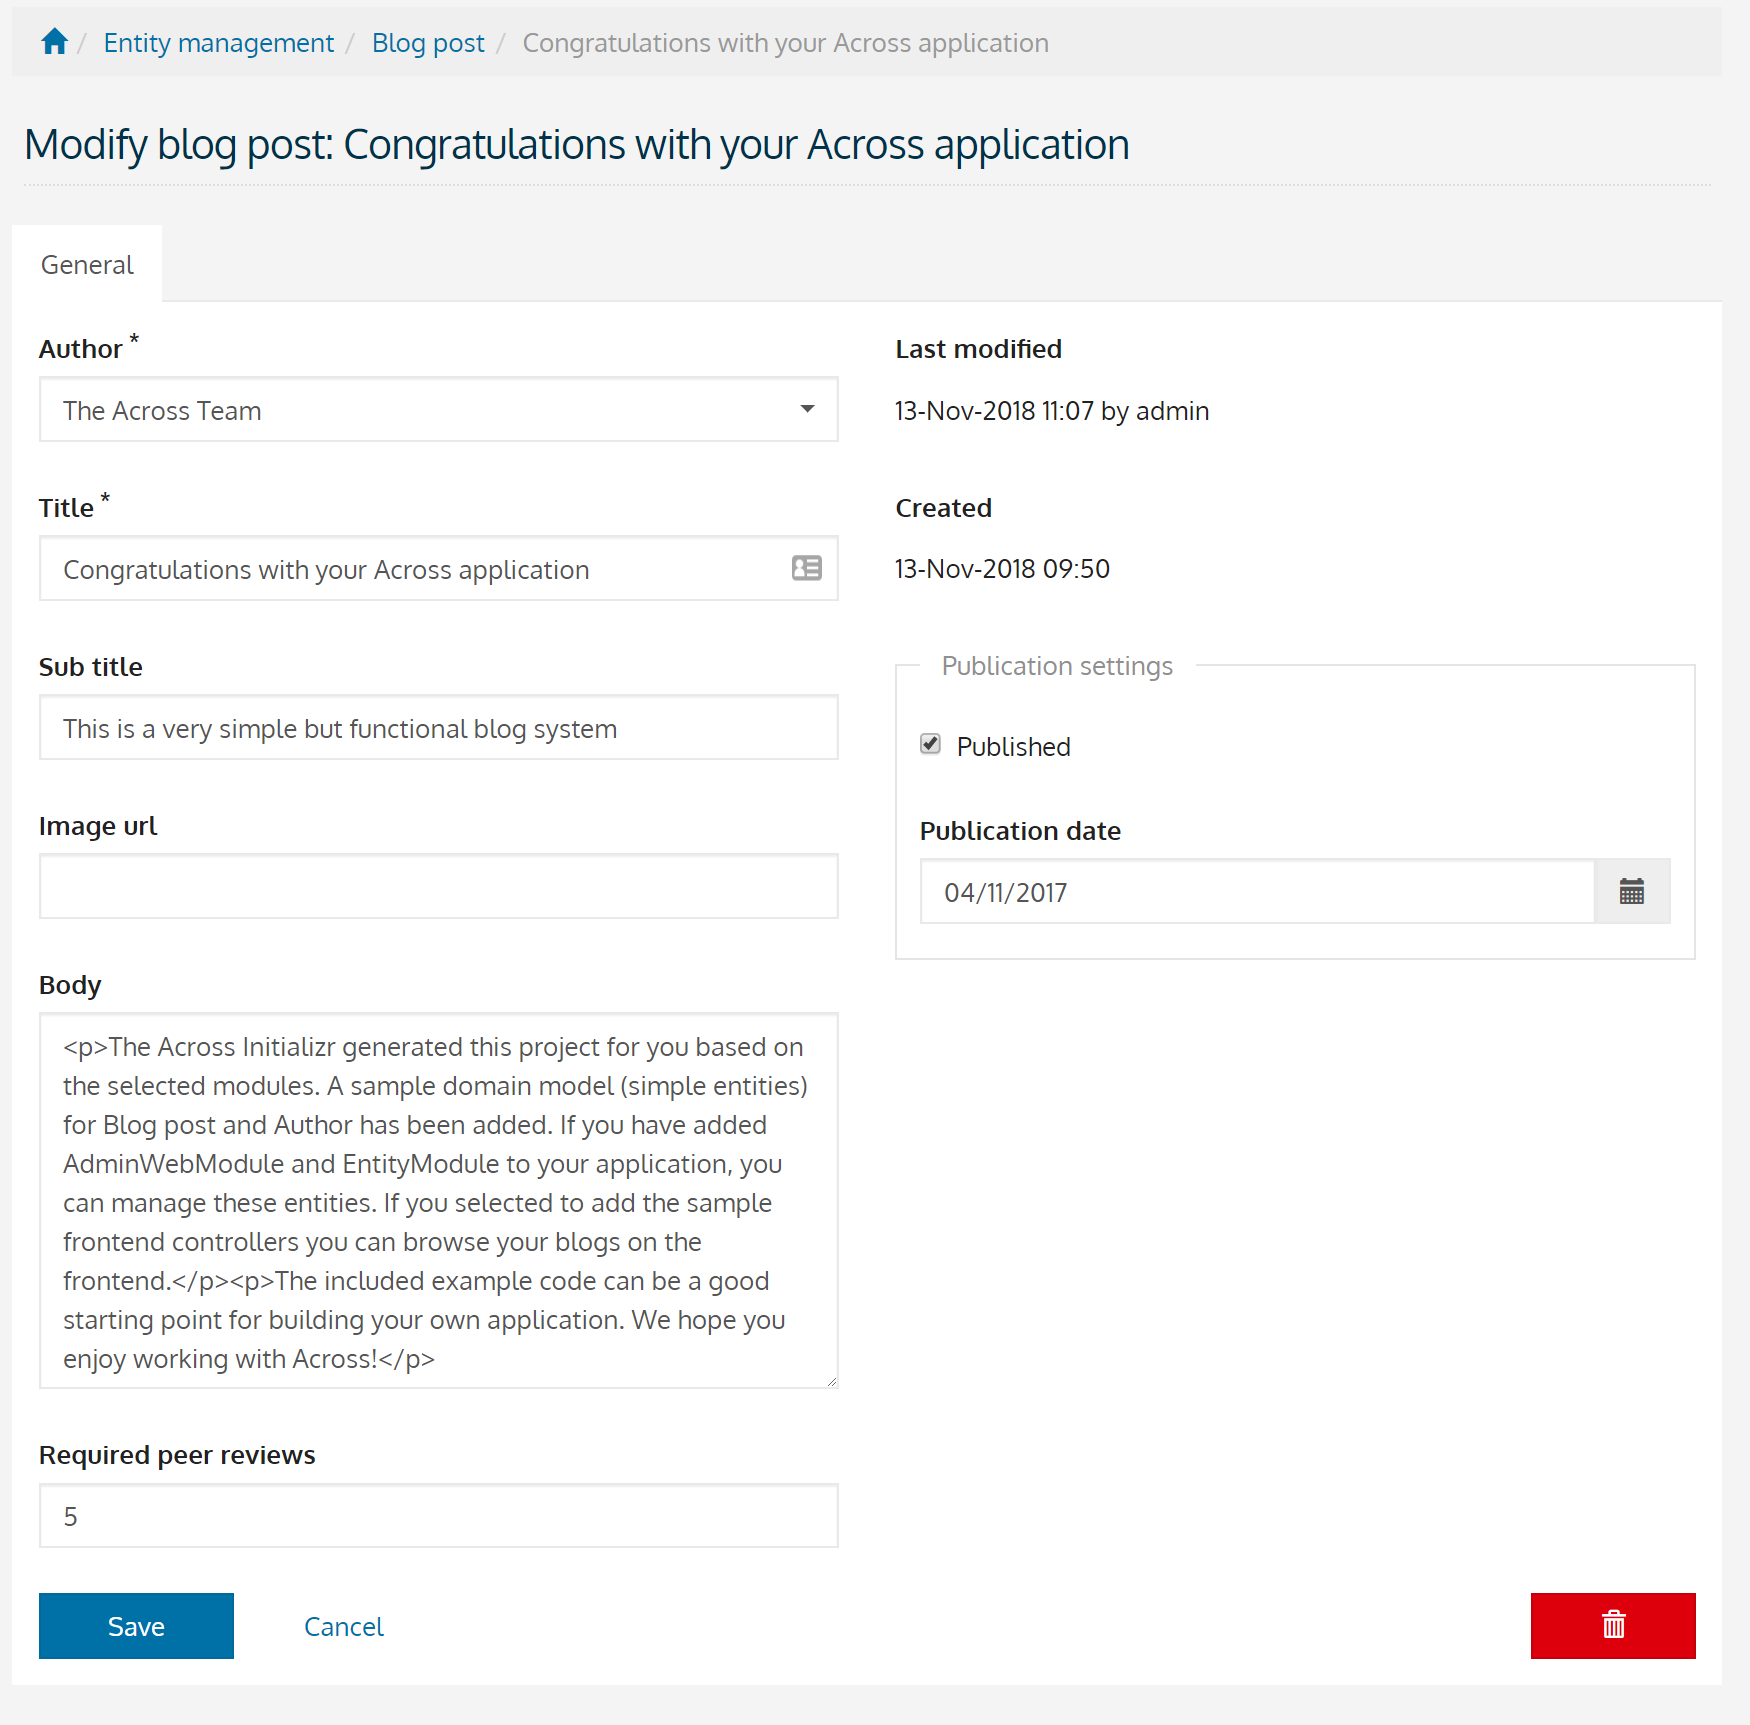
The update view for the blog post is currently not making very good use of space. The various properties are available and can be modified, but they’re all listed under each other, which leaves a lot of space on the right. As such, we’ll move all information that does not pertain to the writing of a blog post, being the publication settings and the auditing information, to the right column of the form.
To move elements from one column to another, we’ll create an EntityViewProcessorAdapter.
public class BlogPostUpdateViewProcessor extends EntityViewProcessorAdapter
{
	@Override
	protected void postRender( EntityViewRequest entityViewRequest, (1)
	                           EntityView entityView,
	                           ContainerViewElement container,
	                           ViewElementBuilderContext builderContext ) {
		moveElementToRightColumn( container, "formGroup-lastModified" );
		moveElementToRightColumn( container, "formGroup-created" );
		moveElementToRightColumn( container, "publicationSettings" );
	}

	private void moveElementToRightColumn( ContainerViewElement container, String element ) {
		ContainerViewElementUtils.move( container, element, SingleEntityFormViewProcessor.RIGHT_COLUMN ); (2)
	}
}| 1 | postRender is one of the final steps in the rendering process.
In this step, the view elements for the controls should be created and able to be moved to a different column. |
| 2 | ViewElements are moved into a different container element. |
We’ll reuse the configuration class that we created for modifying the list view to register the view processor to the update view.
@Override
public void configure( EntitiesConfigurationBuilder entities ) {
	entities.withType( BlogPost.class )
	        .listView(
	                ...
	        )
	        .updateFormView(
			        fvb -> fvb.viewProcessor( new BlogPostUpdateViewProcessor() )
	        );
}
Customizing a property control
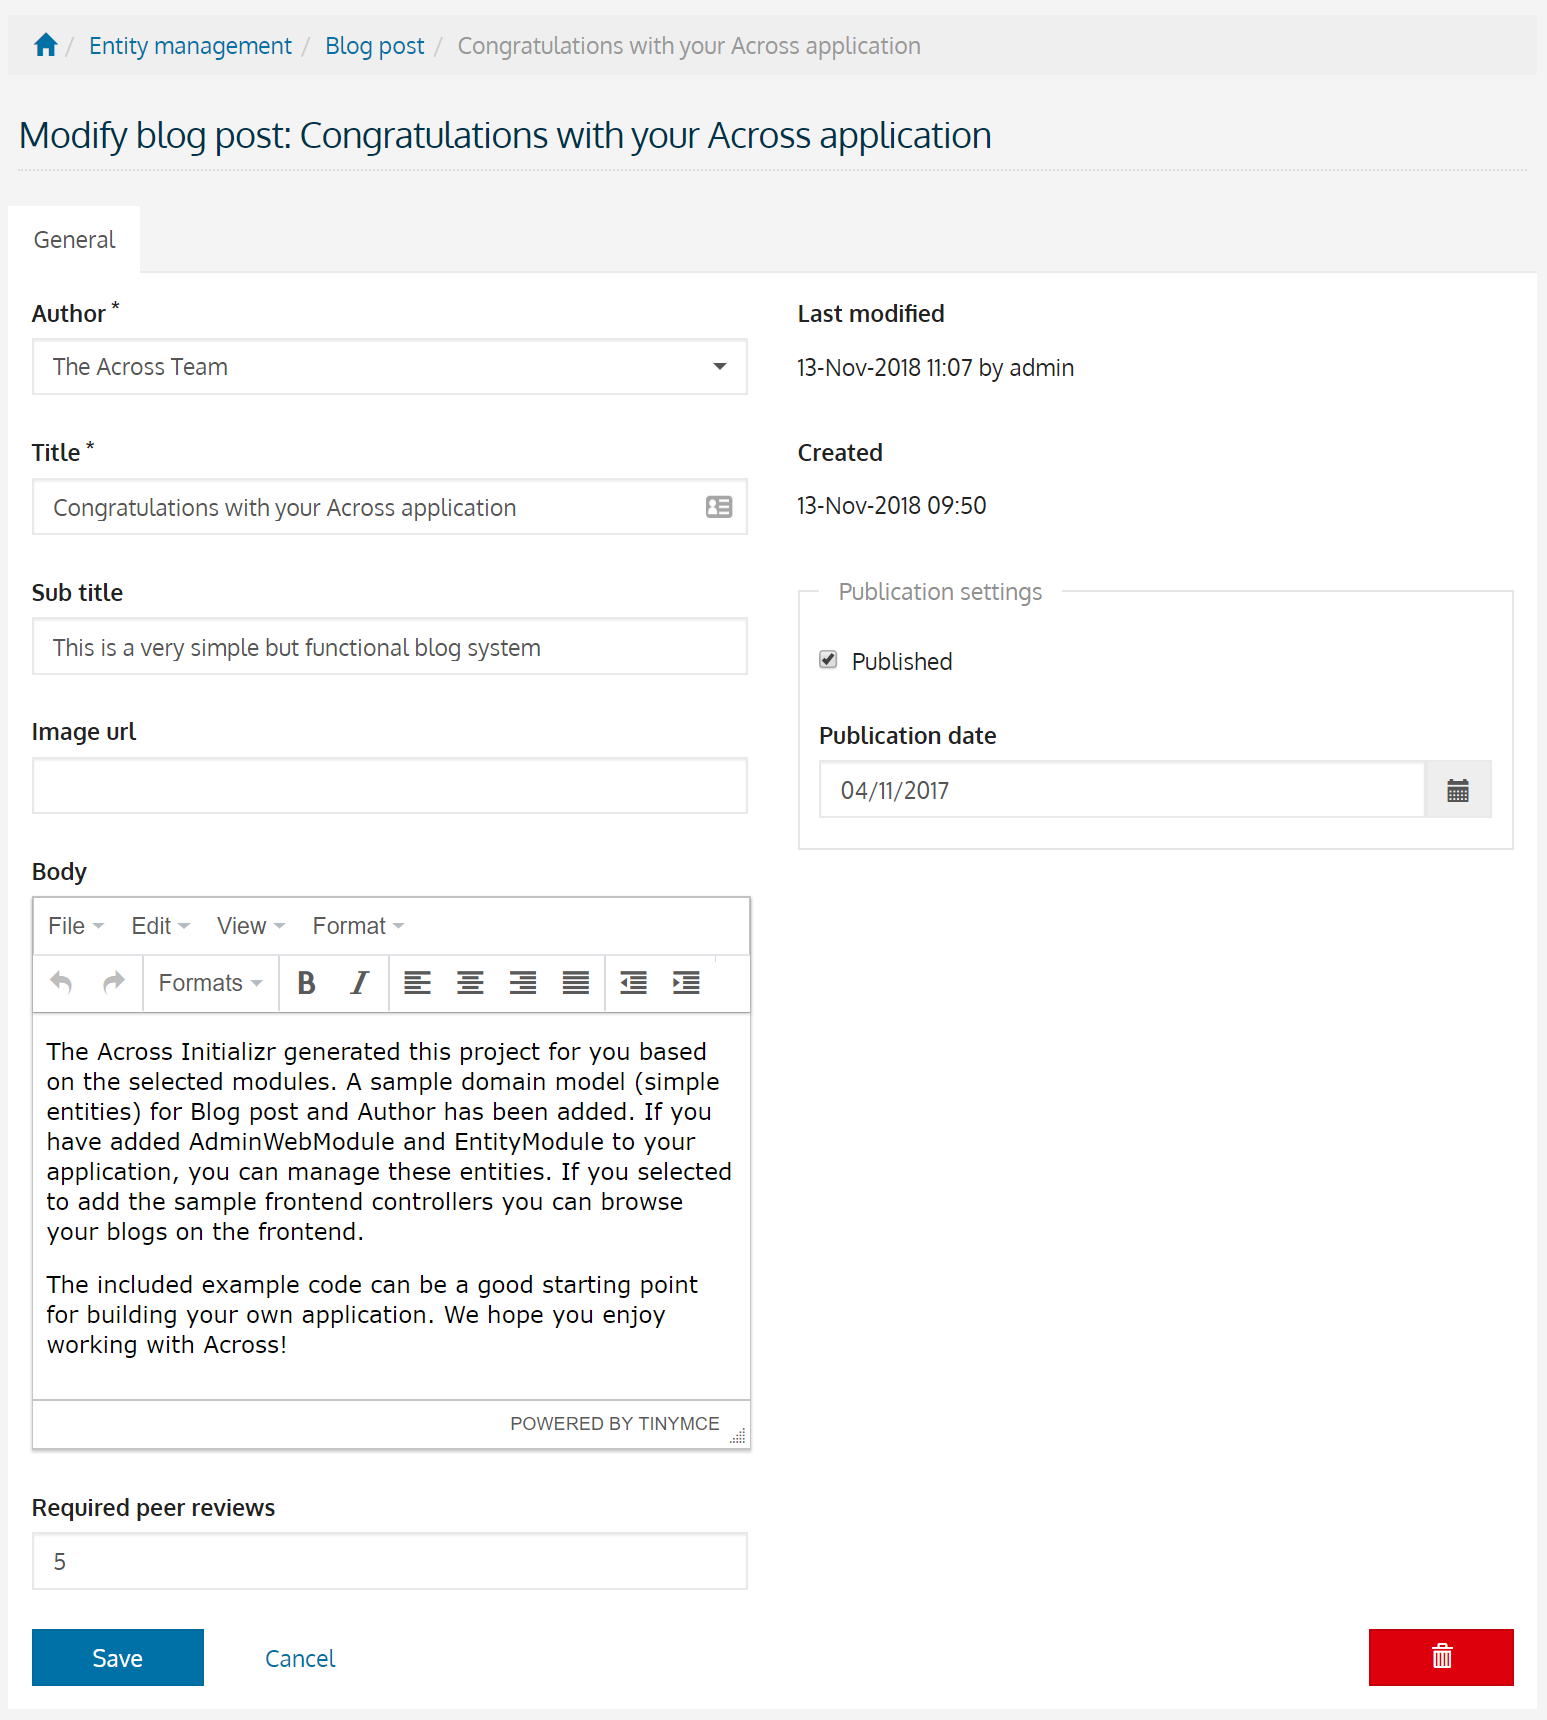
Last but not least, writing our blog post in plain html is not very user friendly. Let’s see whether we can use a rich text editor instead of a simple textbox.
In this example, we’ll configure a rich text editor using TinyMCE. The configuration will be a 2-step process:
-
A
ViewElementPostProcessorwill be used to register the required javascript dependencies and a selector on our element. -
Javascript will be required to initialize the control.
First off, we’ll create the ViewElementPostProcessor.
A ViewElementPostProcessor allows us to modify the created ViewElement.
public class RichTextViewElementProcessor implements ViewElementPostProcessor<TextboxFormElement>
{
	@Override
	public void postProcess( ViewElementBuilderContext viewElementBuilderContext, TextboxFormElement textboxFormElement ) {
		textboxFormElement.addCssClass( "js-tinymce" ); (1)

		WebResourceRegistry webResourceRegistry = viewElementBuilderContext.getAttribute( WebResourceRegistry.class ); (2)
		webResourceRegistry.addWithKey( WebResource.JAVASCRIPT_PAGE_END, "tinymce", "https://cloud.tinymce.com/stable/tinymce.min.js", WebResource.EXTERNAL );
		webResourceRegistry.addWithKey( WebResource.JAVASCRIPT_PAGE_END, "tinymce-initializer", "/static/demo/js/tinymce-initializer.js", WebResource.VIEWS );
	}
}| 1 | A class is configured on the TextboxFormElement that is rendered.
This class will be used as a selector to initialize the rich text editor. |
| 2 | Via the WebResourceRegistry , web resources can be registered.
Here we add the dependency to TinyMCE as well as some javascript to initialize the control. |
Second, we’ll create the javascript file that initializes a TinyMCE rich text editor on elements with the css class js-tinymce.
(function( $ ) {
    tinymce.init( {
                      selector: '.js-tinymce'
                  } );
})( jQuery );
Finally, we’ll have to register the ViewElementPostProcessor on the body property of the BlogPost entity.
@Override
public void configure( EntitiesConfigurationBuilder entities ) {
	entities.withType( BlogPost.class )
	        .listView( ... )
	        .updateFormView( ... )
	        .properties(
			        props -> props.property( "body" )
			                      .viewElementPostProcessor( ViewElementMode.CONTROL, new RichTextViewElementProcessor() ) (1)
	        );
}| 1 | Register the processor we’ve just created.
This will ensure that when the property body is rendered in a ViewElementMode.CONTROL mode, it will be initialized as a rich text editor. |
Upon restarting the application, a rich text editor will be available for the property.
